
First I skim 6 cups of cream off of fresh cow's milk.

6 cups is the measurement I use because that's the size of the container I culture yogurt in.
I heat the cream until it begins to get little bubbles all around the edge of the surface. When it begins to gently boil, I turn off the flame...

then I cool it off till it's still hot but cool enough to keep my finger in it for 25 seconds. See how there's a thermometer in the photo above? I stopped using the stupid thermometer, because it wasn't accurate. Now I just go by how the cream feels when I put my (clean!) finger in it. As I said, it should be hot, but not too hot. You should be able to hold your finger in it for 25 seconds without getting burned.
Next, I put 1 Tbsp of whole milk fresh yogurt into a clean, dry stainless steel container for a starter, stir it a little, gently mix the warm cream in with the starter, cover it, and place it in my yogurt-making set-up. (I make yogurt in a tiffin. That's a stack of stainless steel containers that all fit into one another. On the top of the whole stack is a container with a tight-fitting lid.) In the photo below-left, there's another little container on top, because I had a little extra cream I wanted to culture, so I put it in this container and rested it on top of the tiffin tower.

In my yogurt-making set-up, I use a crock-pot base set on the coolest setting (to keep the yogurt warm, not hot). On top of the crock-pot base, I put the bottom container from the tiffin, with about a half-inch of hot (as hot as it gets from the tap) water inside. On top of that, I put the next container, but I leave it empty, to provide insulating air-space between the hot water and the fermenting yogurt. On top of the empty container, I put the container with the cream and yogurt starter, and if I want to make regular yogurt at the same time, I stack above that a container that's for fermenting regular yogurt. If I have a little extra cream that I want to turn into yogurt, I add another small container on top of the stack. Now, I cover the whole thing with a wool blanket.
 |
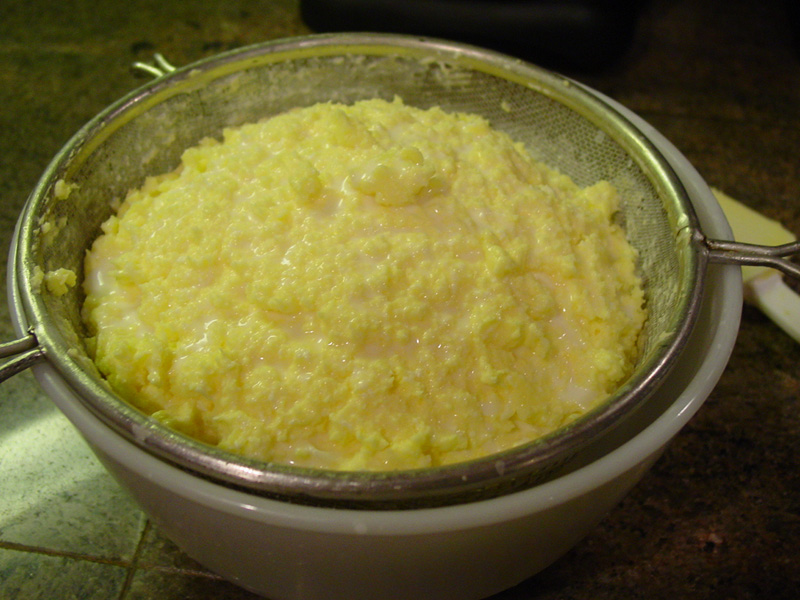
| Cultured cream yogurt |
I am careful not to move the yogurt for six hours. After six hours, I unplug the crock-pot base, and transfer the yogurt to the fridge. I leave it covered and allow it to cool completely. The yogurt in the photo above is more white than usual. Usually, it's more yellow than that.
After six hours, I put the yogurt into the fridge, covered, and let it get cold.
Note: You don't have to refrigerate the yogurt and then warm it back up to make butter. If you just want to churn the butter right away, you can. After dismantling your yogurt-culturing set-up, just let the cultured cream cool off to room temperature, then churn it. I generally refrigerate my yogurt first simply because I usually don't have time to do everything all in one go, so I break my butter-making process up into two segments.
When I'm almost ready to make butter, I take the yogurt back out of the fridge and let it sit on the counter for several hours until it warms up to room temperature.
Note: Cold cultured cream does not turn into butter as easily as room temperature cultured cream. It takes much longer because it has to warm up to room temperature first.
When the yogurt is warmed back up to room temperature, I spoon about 300-350 ml of it into a clean, dry quart jar with a tight-fitting lid. I have experimented with larger and smaller amounts of yogurt in a quart jar, and 300-350 ml seems to work best because that way, there's plenty of air in the jar, and yet there's enough yogurt in the jar to get some momentum going when you're shaking it.
I put the lid on tightly and start shaking. When I first start shaking, it sounds swishy and liquidy. After a while, it gets quieter because it's getting thicker. It gets quieter and thicker because it's filling up with air bubbles and can't move up and down as freely. One way you can tell that the cultured cream yogurt is separating into butter and buttermilk is if you look on the side of the jar, you can start to see yellow and white marbley-looking formations, kind of like smooth, flowing abstract designs.
Note: At this point, making butter is not like making butter out of cold, fresh cream. You may not see such a dramatic difference between the butter and the buttermilk as you do with fresh cream butter. Because it is being churned at room temperature, the butter is softer than that made with cold, fresh cream. Still, though, when it turns into butter and buttermilk, the butter will be noticeably separate from the buttermilk.
Butter-churning takes place in three stages. You can tell by the color and also by the sound of the yogurt when you are shaking it in the jar what stage you're at. First, it will sound kind of thickly sloshy, then the sound will diminish to a more quiet, muffled sound, because it's getting filled with air bubbles and is more viscous, more the consistency of something like thin pudding. Then when the yogurt "breaks"--when it separates into butter and buttermilk--it will slosh more loudly, the sound will be slightly higher-pitched and it will sound even more like liquid than when you first started. At this point, you can shake it just a few more shakes, then stop. Open up the jar and peek inside. You should see a clear separation of butter (clumpy, yellow curds) and buttermilk (white liquid). You will see bits of solid, yellow butter kind of all stuck to each other like a little cluster of yellow curds, and the white liquid buttermilk is easy to distinguish from the butter. It generally takes me about 5 minutes to churn one 300-350 ml batch of yogurt. Altogether, the shaking of 6 cups of cultured cream divided into three 300-350 ml batches takes me anywhere from 45 minutes to an hour.
Butter-churning takes place in three stages. You can tell by the color and also by the sound of the yogurt when you are shaking it in the jar what stage you're at. First, it will sound kind of thickly sloshy, then the sound will diminish to a more quiet, muffled sound, because it's getting filled with air bubbles and is more viscous, more the consistency of something like thin pudding. Then when the yogurt "breaks"--when it separates into butter and buttermilk--it will slosh more loudly, the sound will be slightly higher-pitched and it will sound even more like liquid than when you first started. At this point, you can shake it just a few more shakes, then stop. Open up the jar and peek inside. You should see a clear separation of butter (clumpy, yellow curds) and buttermilk (white liquid). You will see bits of solid, yellow butter kind of all stuck to each other like a little cluster of yellow curds, and the white liquid buttermilk is easy to distinguish from the butter. It generally takes me about 5 minutes to churn one 300-350 ml batch of yogurt. Altogether, the shaking of 6 cups of cultured cream divided into three 300-350 ml batches takes me anywhere from 45 minutes to an hour.
 |
| Strain the butter and buttermilk through a sieve into a large bowl |
I scrape out the contents of the jar thoroughly with a spoonula (my hat's off to whoever invented the spoonula!). I make sure to place the sieve over a bowl because I definitely want to save all the buttermilk. The buttermilk from cultured cream butter is so delicious and so good for you, that it's definitely worth learning how to make cultured cream butter, if for no other reason than to just have the buttermilk! I let the buttermilk drip off the butter into the bowl while I shake the next batch. After the second batch "breaks," I plop it out on top of the first batch, and let it drip while I shake the third batch. Usually, I'm done after three or four batches.
After the butter is all churned and it's all been transferred to the sieve, I set up a wooden cutting board positioned at a slant and propped up in a large glass baking dish. I then plop the strained butter out onto the wooden cutting board. Immediately, buttermilk starts to drip down from the mass of butter into the baking dish. I press the butter and work it with the back of a spoonula. That's how I get out all the rest of the buttermilk.
 |
| Press and work the butter until all the buttermilk has drained off into the glass baking pan |
A long time ago when I first started making butter, I didn't know how to get out all the buttermilk, and I lost quite a bit. Nowadays, I am really into squeezing out every drop of buttermilk that I possibly can, because it's so yummy and so good for you. I press the butter, squeeze out the buttermilk...

press it some more, squeeze out more buttermilk...

and keep doing that for about a half an hour until I can't get any more buttermilk out of the glob of butter. Sometimes I've even worked it longer. I just can't stand to throw away any buttermilk if I can help it.
Note: You have to get out all of the buttermilk so that the butter doesn't turn rancid.
Once you taste the buttermilk, you'll know why I squeeze out and save all the buttermilk I possibly can. At the end of this process, I hold onto the mass of butter by supporting it with the spoonula while I tip the cutting board to pour off the last little bit of buttermilk that's left. Then I pour and scrape all of the buttermilk I've collected into a clean, dry quart jar, screw on the lid, label it and put it in the fridge. Now it's time to wash the butter.
I fill a big bowl with cold water. In the winter, I'm too wimpy to use ice, so I just use plain cold water. It works just fine. Next, I plop the butter into the bowl of cold water and knead it with my hands.

As I knead the butter under the cold water, clouds of leftover buttermilk leave the mass of butter. Simultaneously, the butter becomes even more firm and easier to work with. I keep pouring out the cloudy water and refilling the bowl with fresh water to knead the butter in. Here's what the butter looks like after the buttermilk is all out.
I don't usually salt my butter, but if you want to salt yours, you should let it warm up to room temperature before adding the salt. That way, it's easy to mix the salt in thoroughly. There's not a standard measurement for how much salt to put into butter, so you can just experiment. I have found that 1/2 tsp of salt worked pretty well in 2 cups of butter. But some people like more salt than that.
Here are some cute little butter balls from when my hubby and I first made butter.

You can also form the butter into just one big ball.

That's what I always do now. I mold all the butter into one big ball...
...pop it into a storage container or two, fill the container(s) the rest of the way with cold water (that keeps the air bubbles out of the butter so it stays fresh longer), cover it, label it, and stick it in the fridge.

When you take it out of the fridge, you just pour off the water (I pour it through a strainer, in case there are any little bits of butter randomly floating in the water) and then use the butter. When you're finished taking out whatever butter you need, you just stick the rest of the butter back into the container, fill it back up with cold water again, and put it back in the fridge.
Homemade probiotic butter and buttermilk are healthy and delicious. Homemade butter can be used in place of store-bought butter in any recipe. A small portion of homemade buttermilk can be served at the end of a meal, and the buttermilk can be sipped slowly to aid digestion.
My repected PhaliniDevi[mother/a great friend]
ReplyDeleteI have been inspired to read yours blog from my husband, Dr Rajatsubhra. This is a beautiful blog. Please inform us if you come to India. We will meet you.
with love & best Pranams,
Rakhi Mukhopadhyay.
Thank you so much, Rakhi. It's a pleasure to meet you on my blog. I appreciate the invitation. Let's stay in touch. --Phalini
Delete